Get started
Let’s start deploying your first application on your device with SPEKTRA Edge. Here is the summary of the process:
- Setting up your Raspberry Pi device and bringing it online on the SPEKTRA Edge dashboard.
- Deploying a Nginx application on the device.
- Verifying your application through the SPEKTRA Edge dashboard.
Once you’ve completed this guide, you’ll gain the fundamental knowledge how to deploy your applications on your device with SPEKTRA Edge platform.
What you need
- a Raspberry Pi device — see supported devices if you need to use other hardware
- a tool to flash SPEKTRA Edge OS onto the device, such as the Etcher OS image flasher
- access to the SPEKTRA Edge dashboard
And also, the cuttle CLI command is necessary to complete this guide, which is used to access the Nginx application from the local machine for the verification purpose. However, it is not required for deploying applications on SPEKTRA Edge.
Create a project
Let’s first create a project, which manages the group of devices. It’s the one stop shop to deploy and manage your devices and applications in a unified fashion.
To create your first project, log into your SPEKTRA Edge dashboard and click Create project on your right.

Create project button on the Projects page.
Enter a project name and the region close to your devices, and click Create:
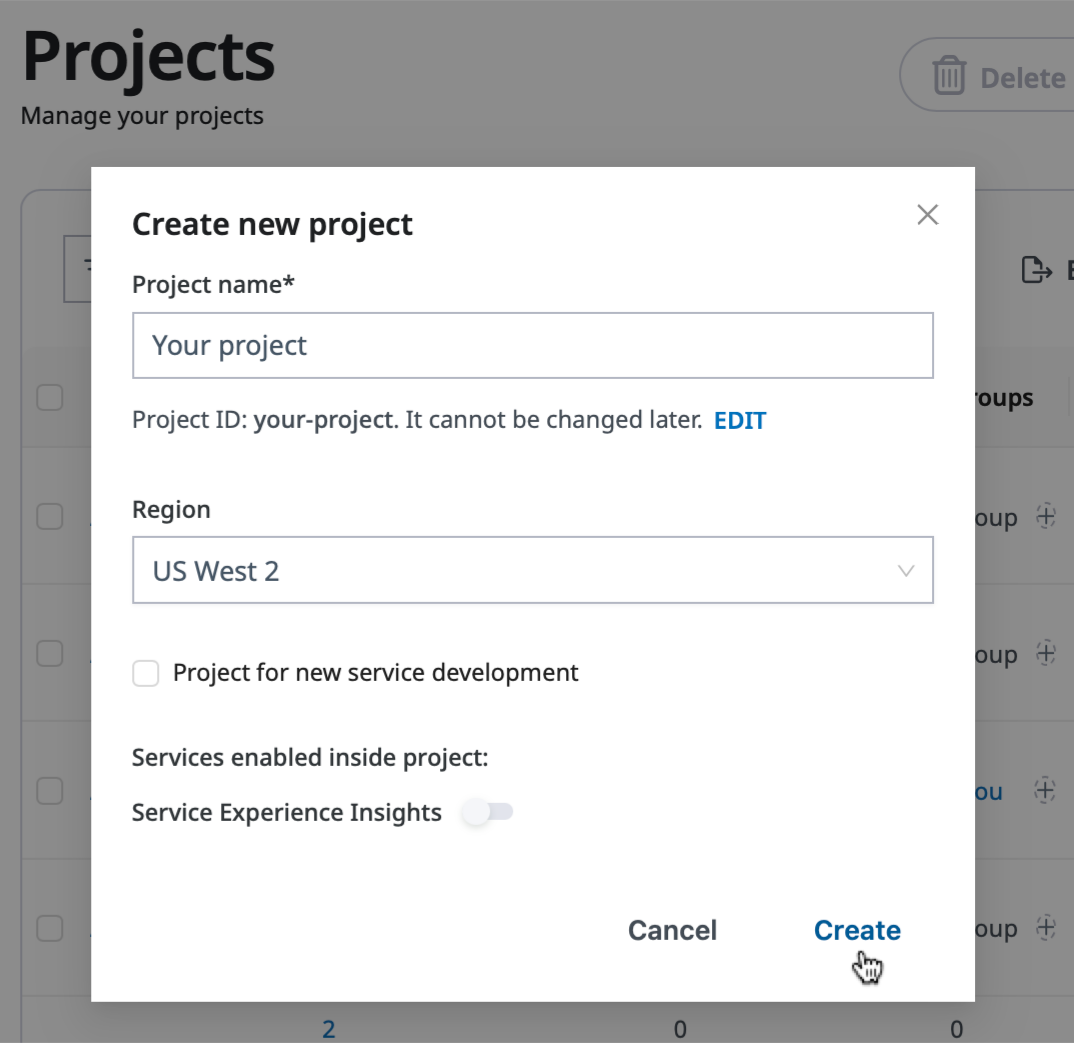
Create button on the Create new project pane.
You’ll then be redirected to the summary of projects, which you can select one you just created and add your first Raspberry Pi.
Add a device and download OS
SPEKTRA Edge builds a custom SPEKTRA Edge OS image configured for the Raspberry Pi device, which allows it to be provisioned for SPEKTRA Edge platform in the later stage.
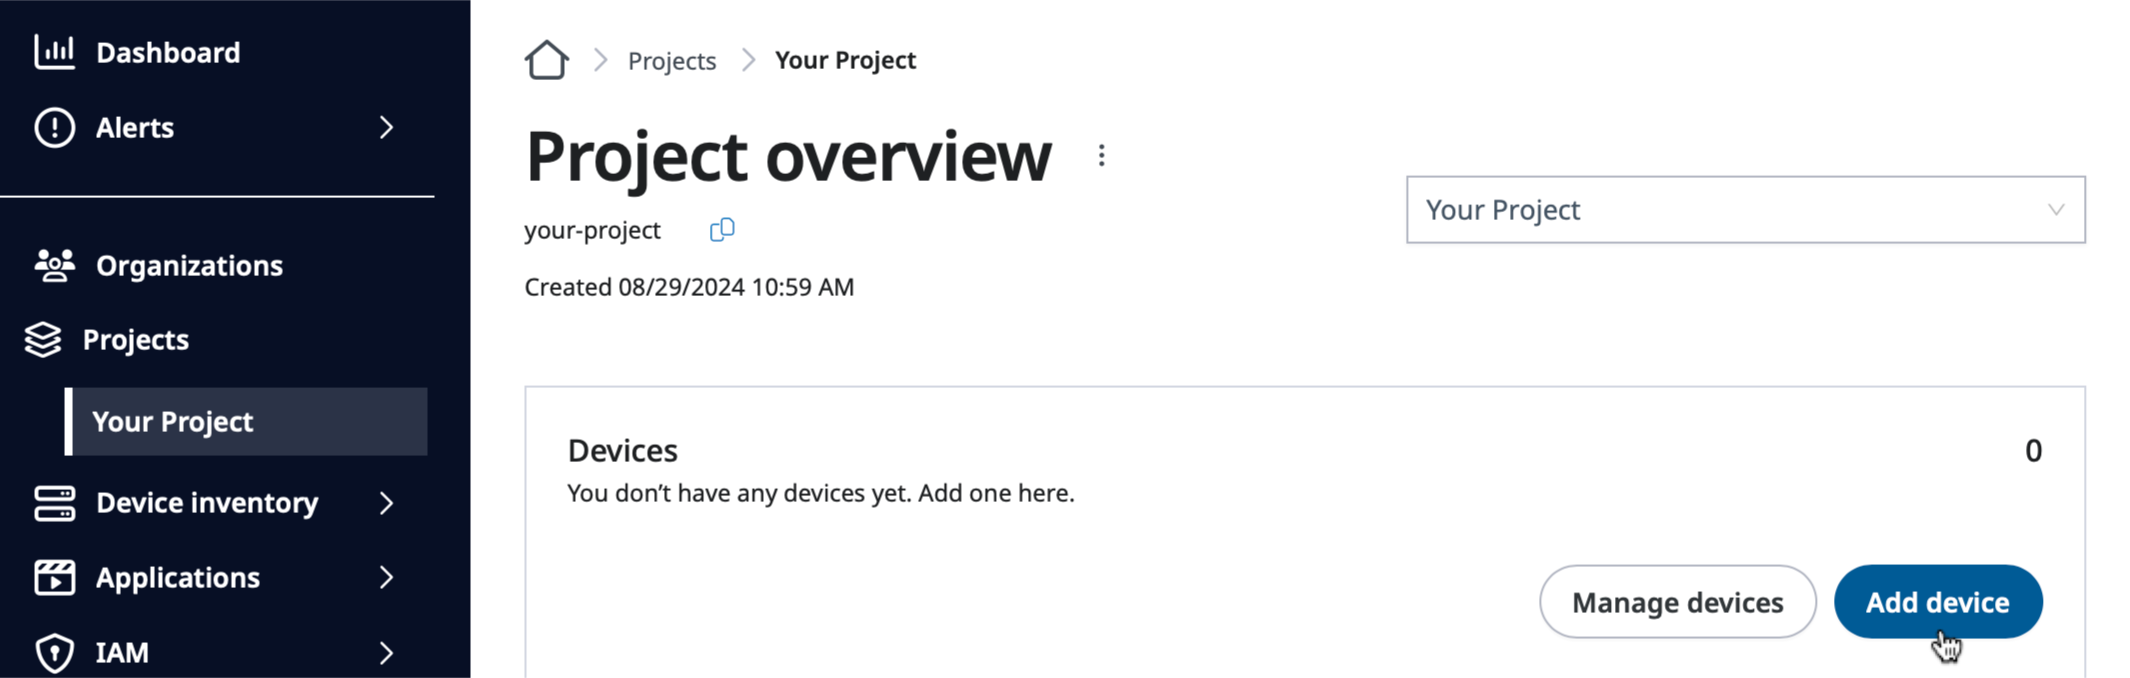
Add device button on the Project overview page.
Start by clicking Add device on the project overview and select Download bootable OS with default configuration option under the register devices section.
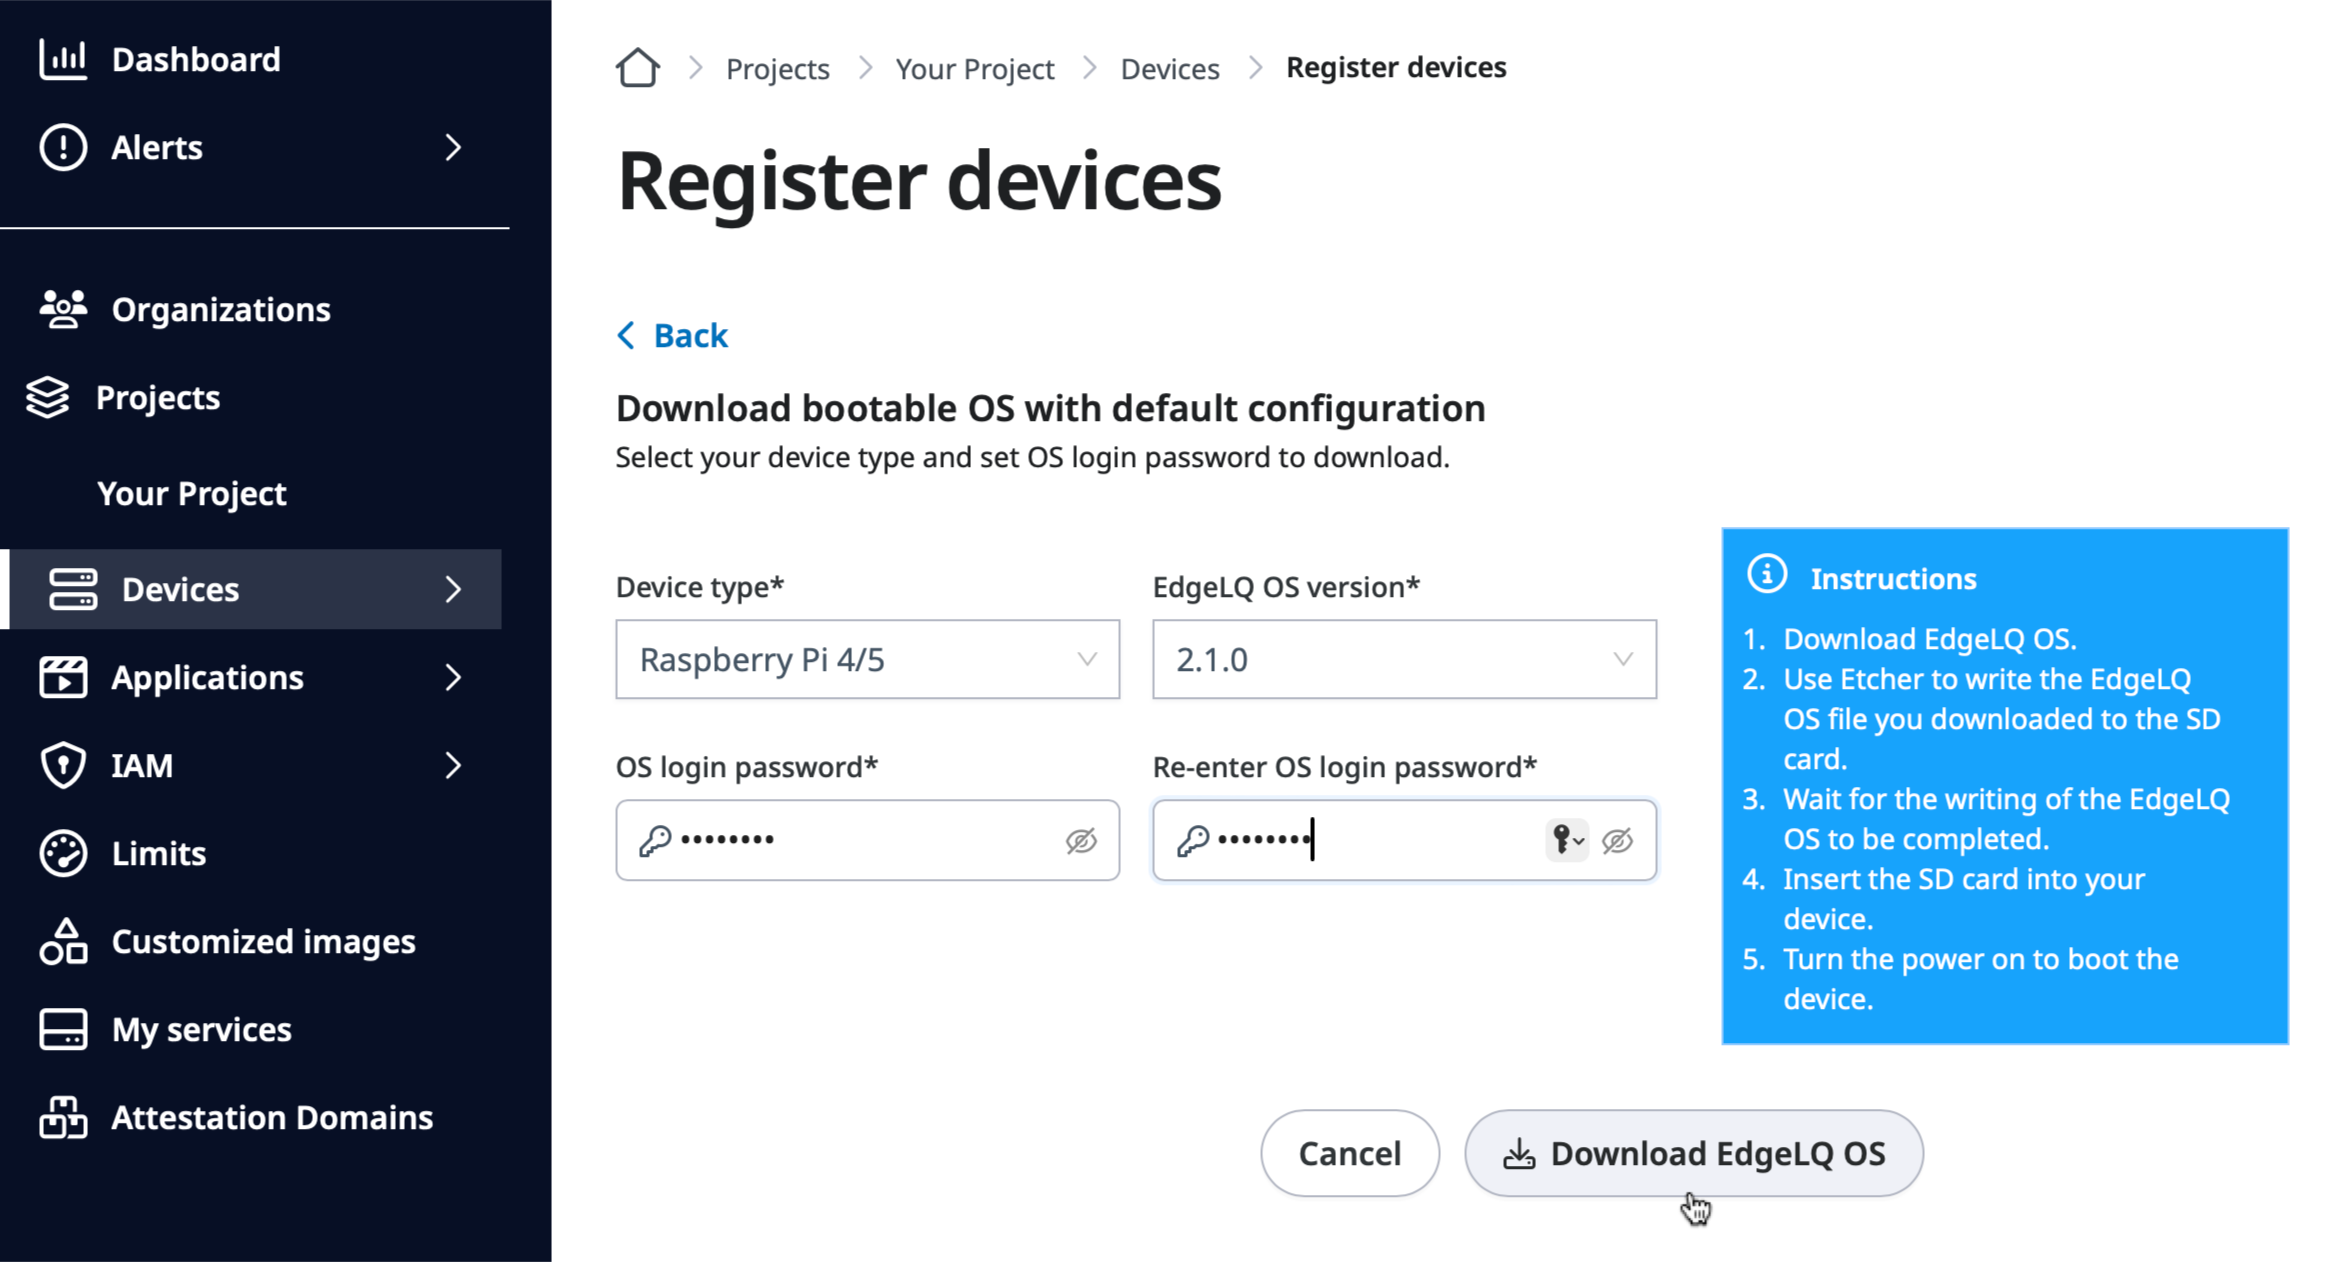
Download button on the Register devices page.
Select the Raspberry Pi device type with the supported OS version. Click Download once you give the root login password.
Device provisioning
Now, let’s flash the downloaded SPEKTRA Edge OS image to the device.
Here are the steps to follow to flash the OS image and boot the device:
- Insert the SD card to the local machine.
- Write the SPEKTRA Edge OS image you downloaded to the SD card.
- Insert the SD card into the Raspberry Pi.
- Power up the Raspberry Pi with the power cable to boot the device.
- Make the on-board eMMC storage accessible to the local machine.
- Write the SPEKTRA Edge OS image you downloaded to the eMMC storage.
- Boot the device from eMMC storage.
Please take a look at the official Raspberry Pi compute module documentation for more detail.
Once it’s connected to the network, the new device should be shown as online and you should be able to develop application on it.
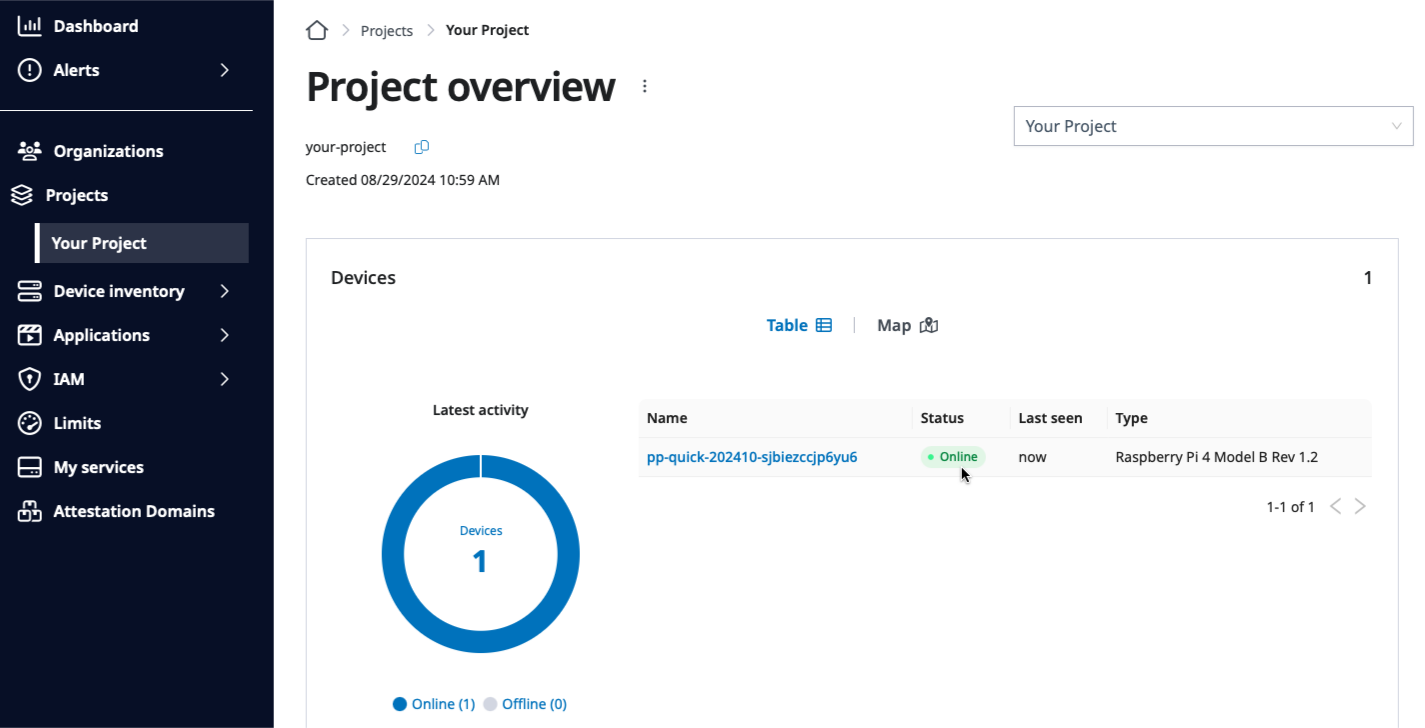
The newly provisioned device in Online status on the Project overview page.
Let’s check the device serial number and other device information to double check if it’s the correct device. Click the name of the device to go to the Device overview page.
Here, you can check the device information including:
- Device status
- Device type
- OS version
- Device serial number
- IP addresses
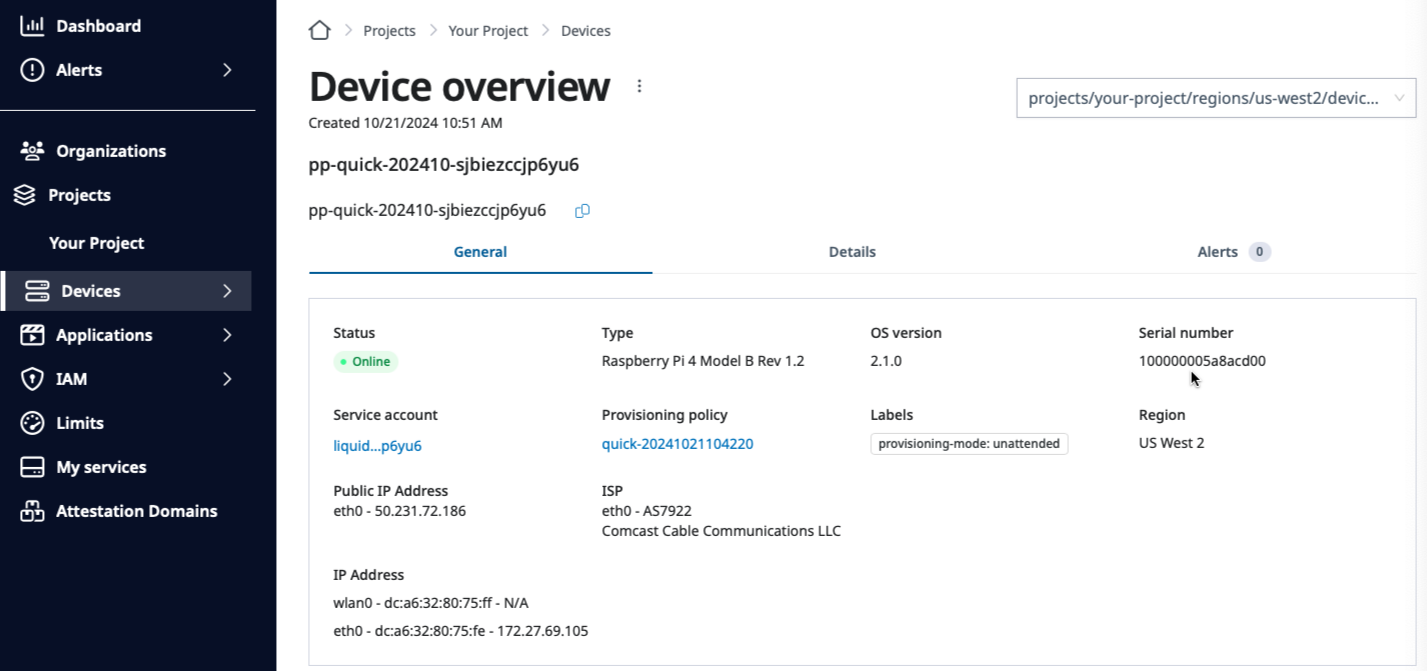
Device serial number on the Device overview page.
Now, let’s set the device name for easy reference. Select the Edit details option of the Device overview pull-down menu shown by hovering over the vertical triple dots right next to the Device overview page title.
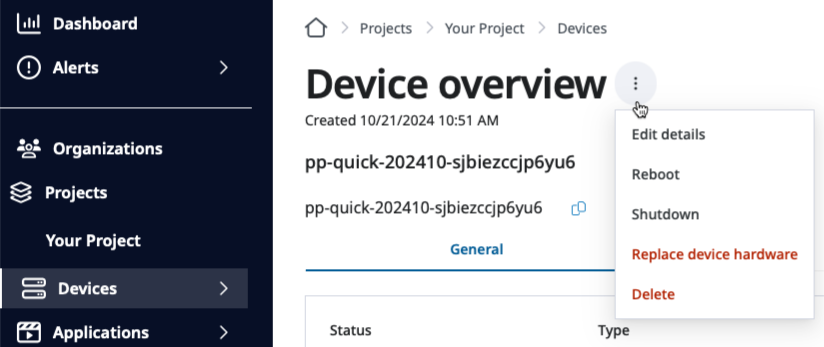
The Device overview pull-down menu on the Device overview page.
Let’s deploy your first application on this device.
Deploy your application
Now the device is ready, let’s deploy a Nginx application on your device.
SPEKTRA Edge provides the docker compose environment on your device so that the applications can be declared and deployed through the standard docker compose file format.
Please refer to the docker documentation for the docker compose file format.
First, click the Deploy pod on the project overview page.
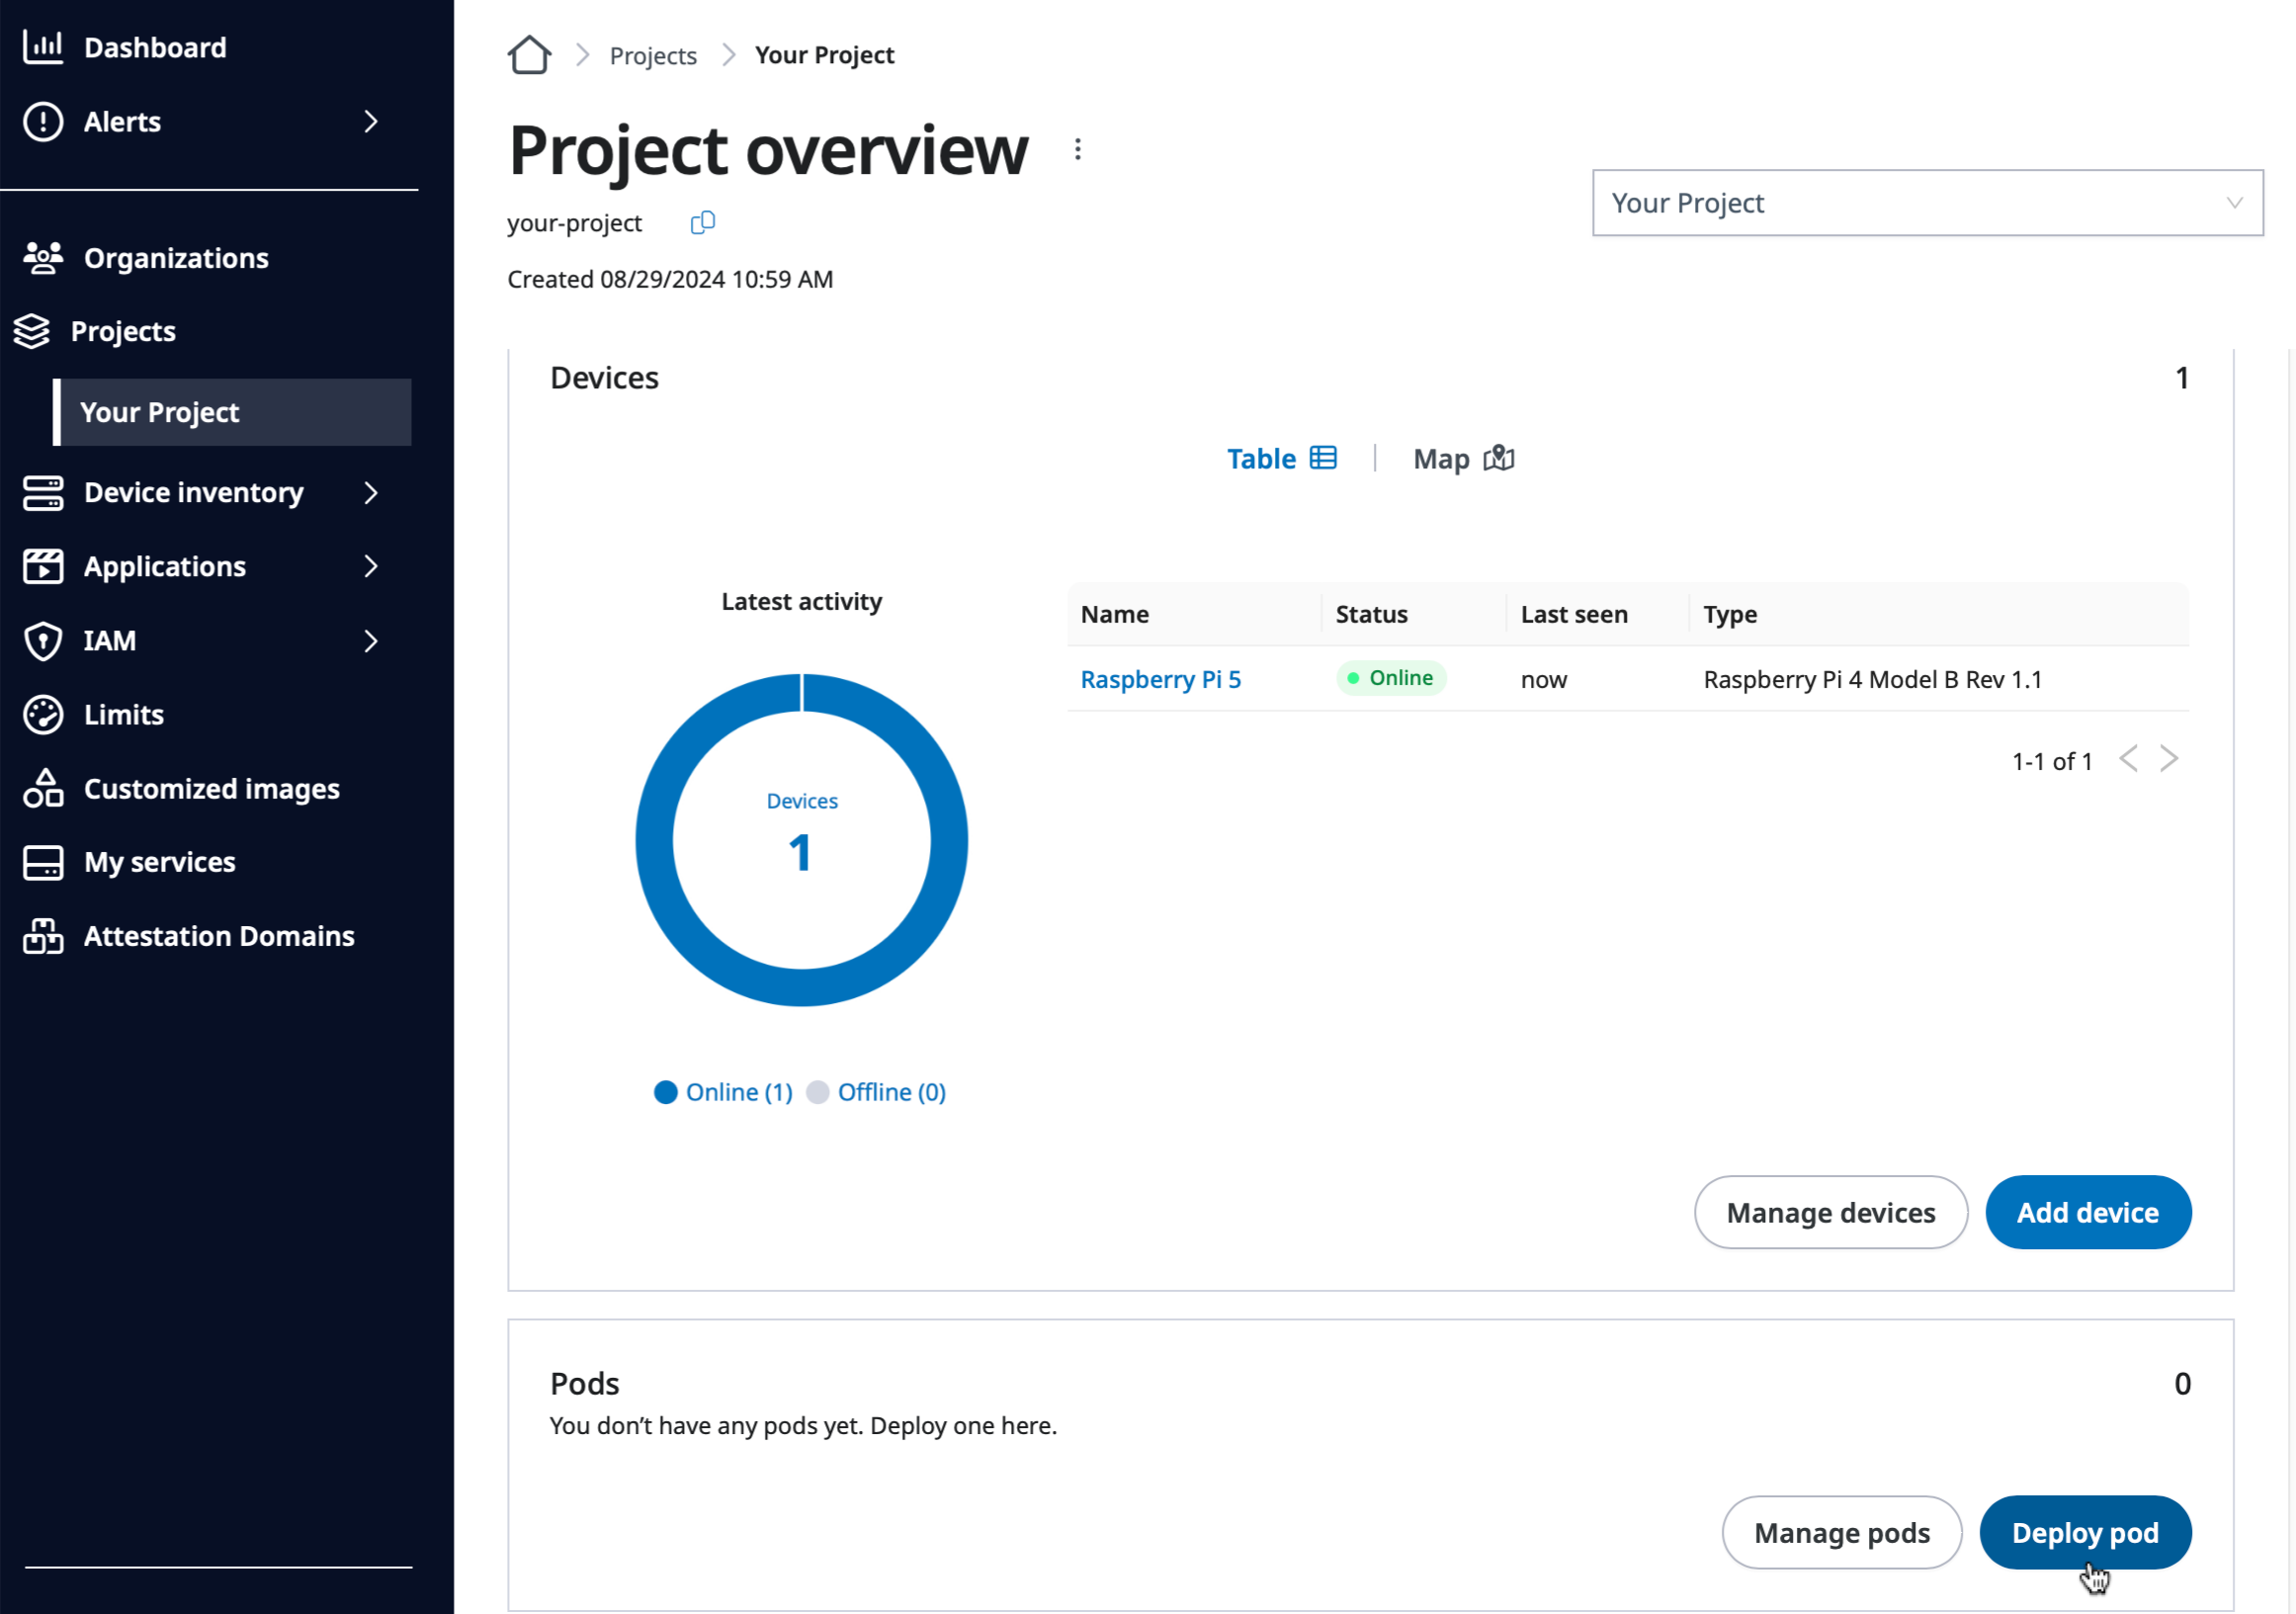
Deploy pod button on the Project overview page.
Select Deploy on a single device option and provide the following information:
- Application name
- Application description
- Docker compose file
services: app: image: nginx:latest ports: - 8080:80 - Target device to deploy
Then, click Deploy to deploy your first application.
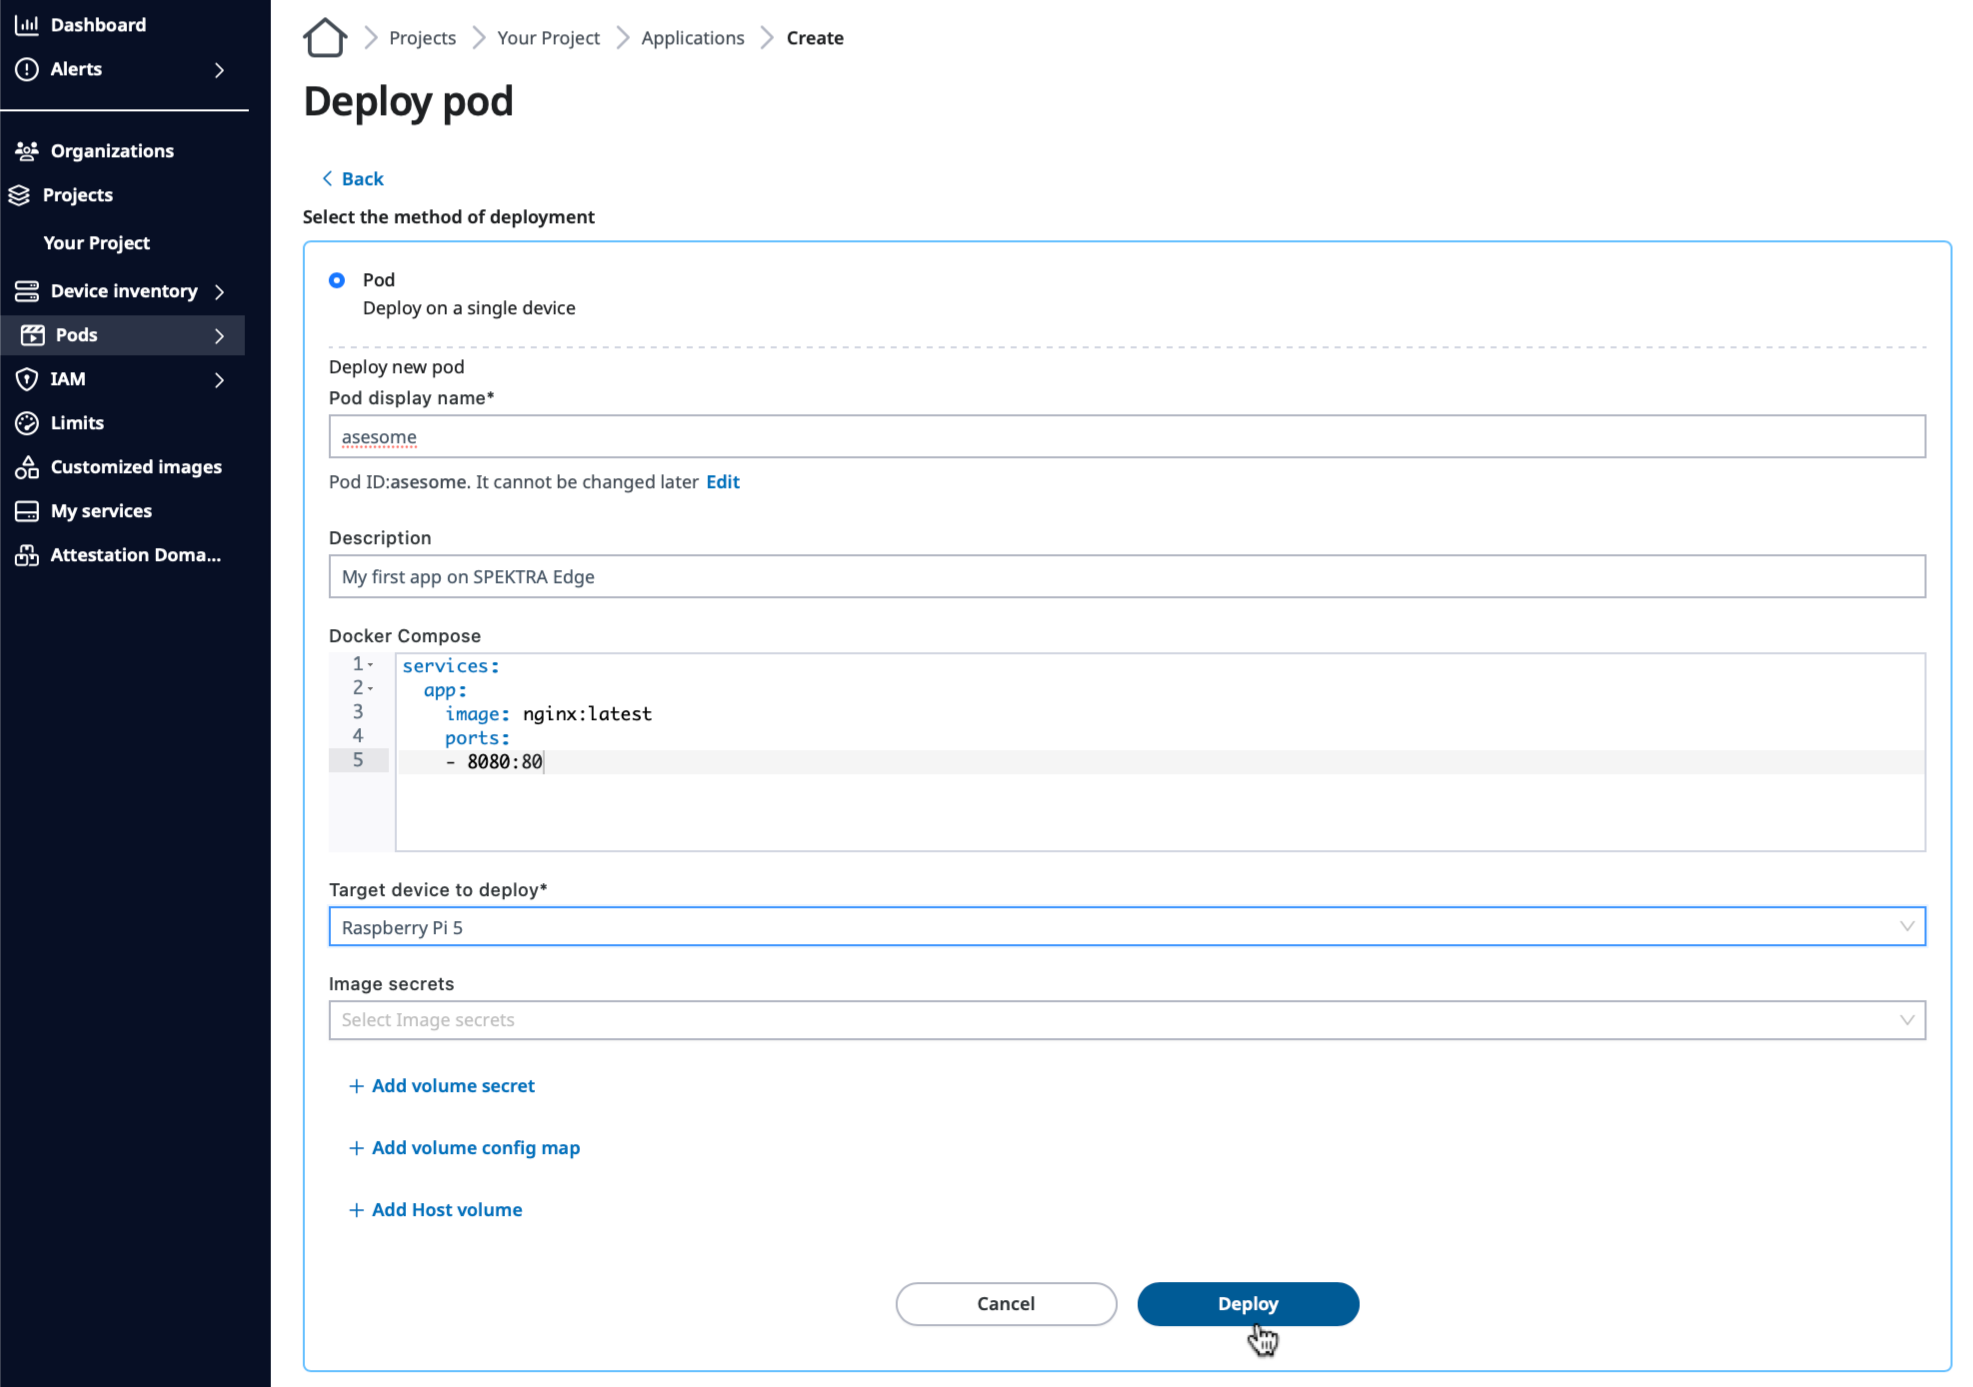
Deploy button on the Deploy pod page.
Congratulations. You just deployed the first application on your device through SPEKTRA Edge!
Verify your application
Now check the application through the applications overview page.
Here, you can see the application you just deployed successfully running on your device.
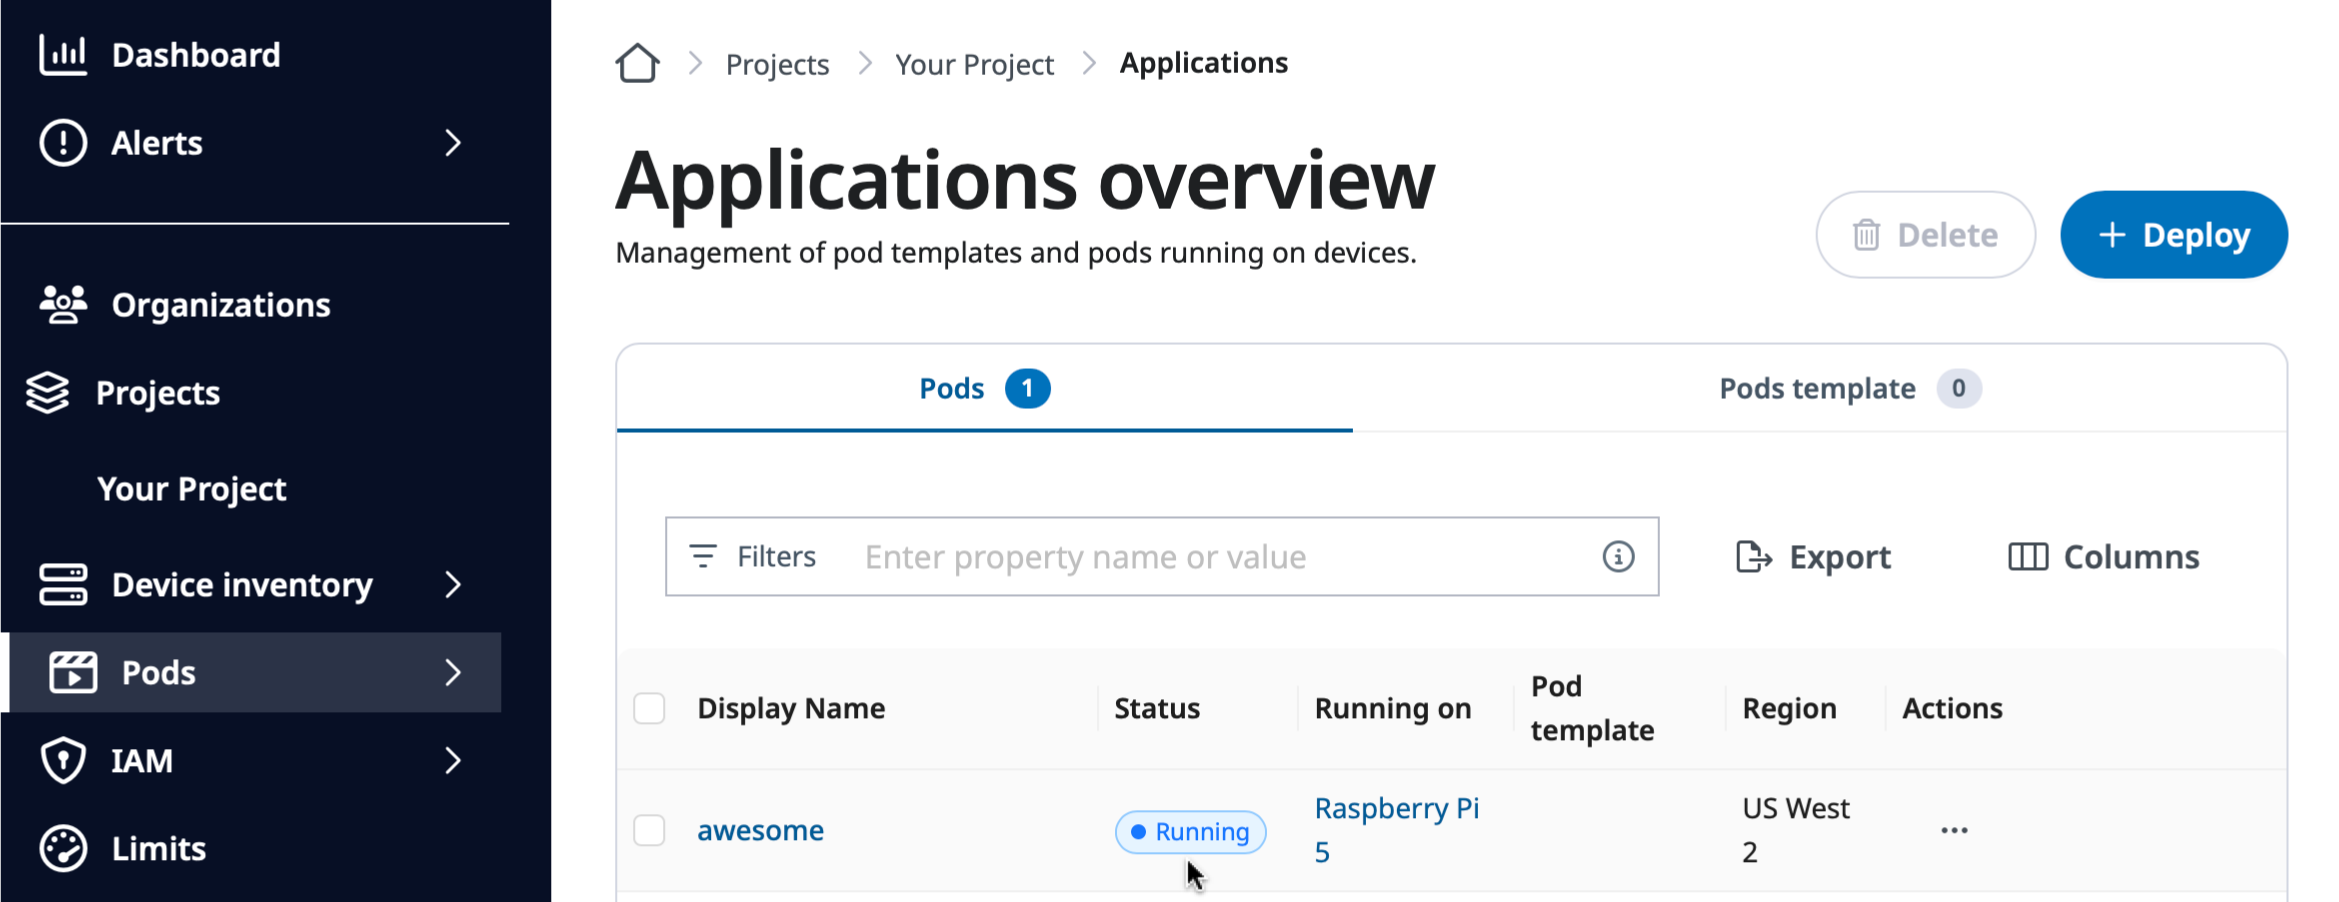
Application status column on the Applications overview page.
Click the application name on the page above and scroll down to the Logs section of the application detail page to check the application logs by clicking the Start button.
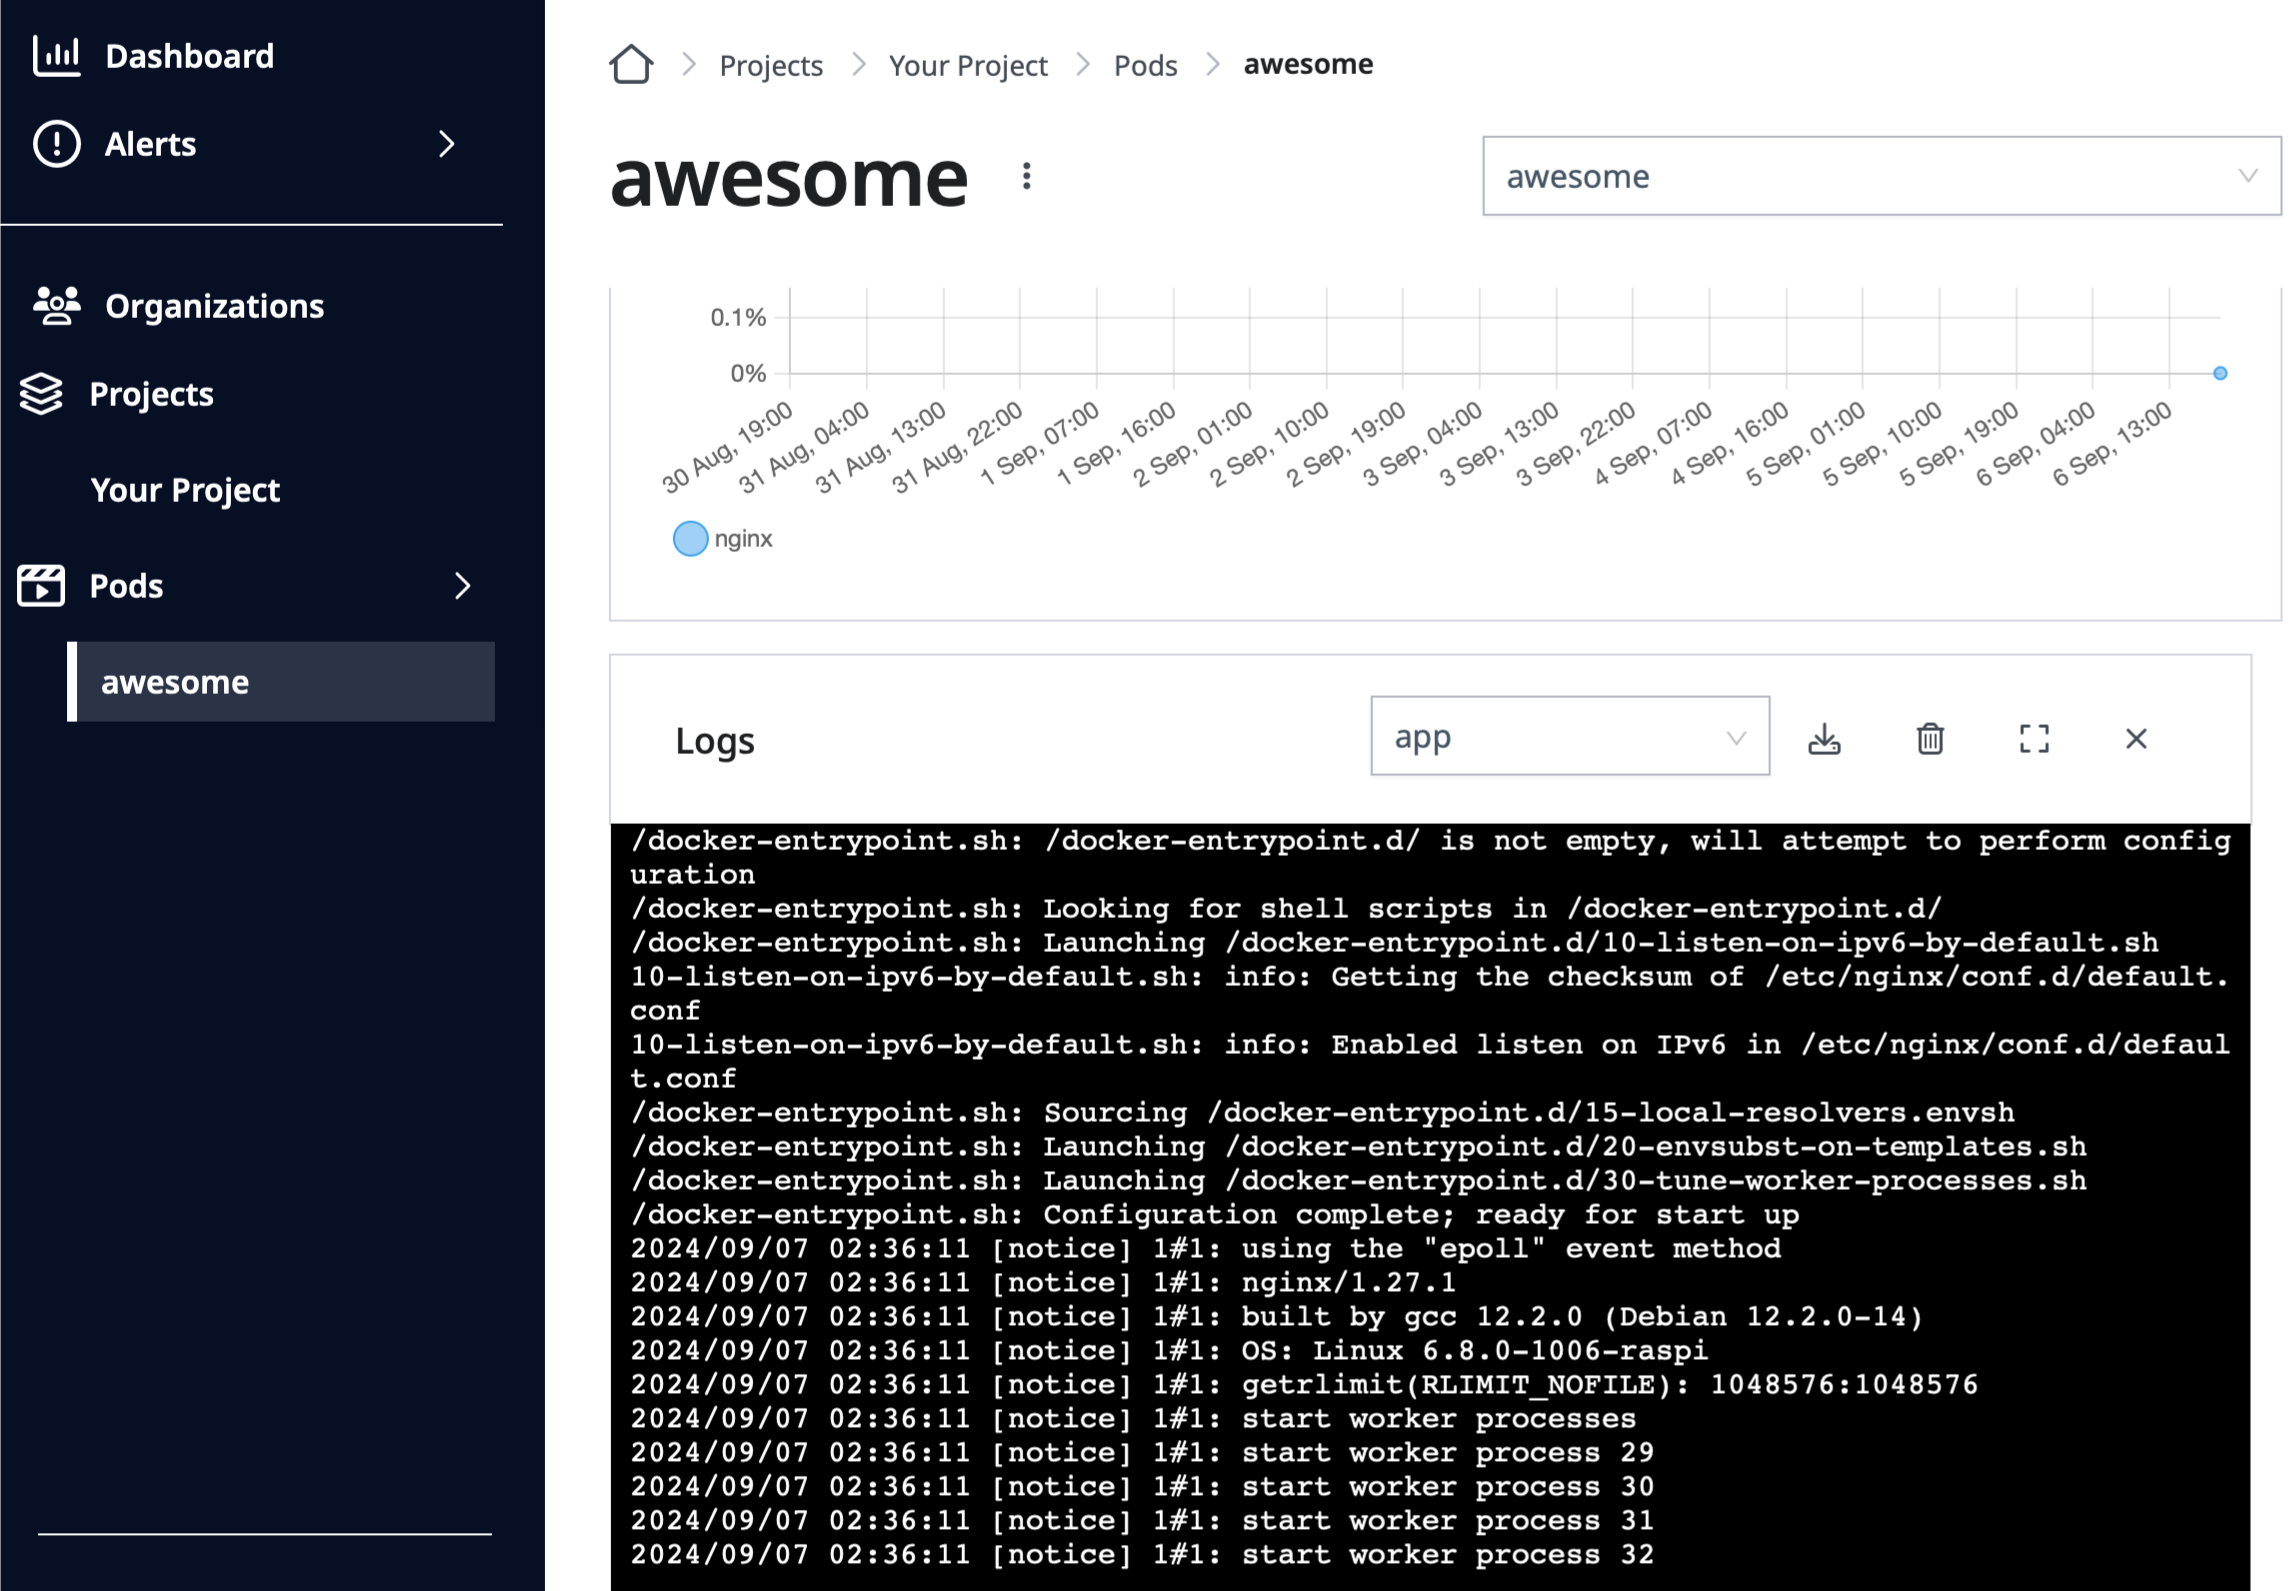
Application logs window on the Application page.
Here you can see your application successfully running on your device.
Accessing your application
You can access your application from your local machine with the SPEKTRA Edge port-forwarding feature.
Please install the cuttle CLI command on your local machine and authenticate yourself for this operation to succeed.
Go to the application page and copy the port-forward command located under the Docker compose section.
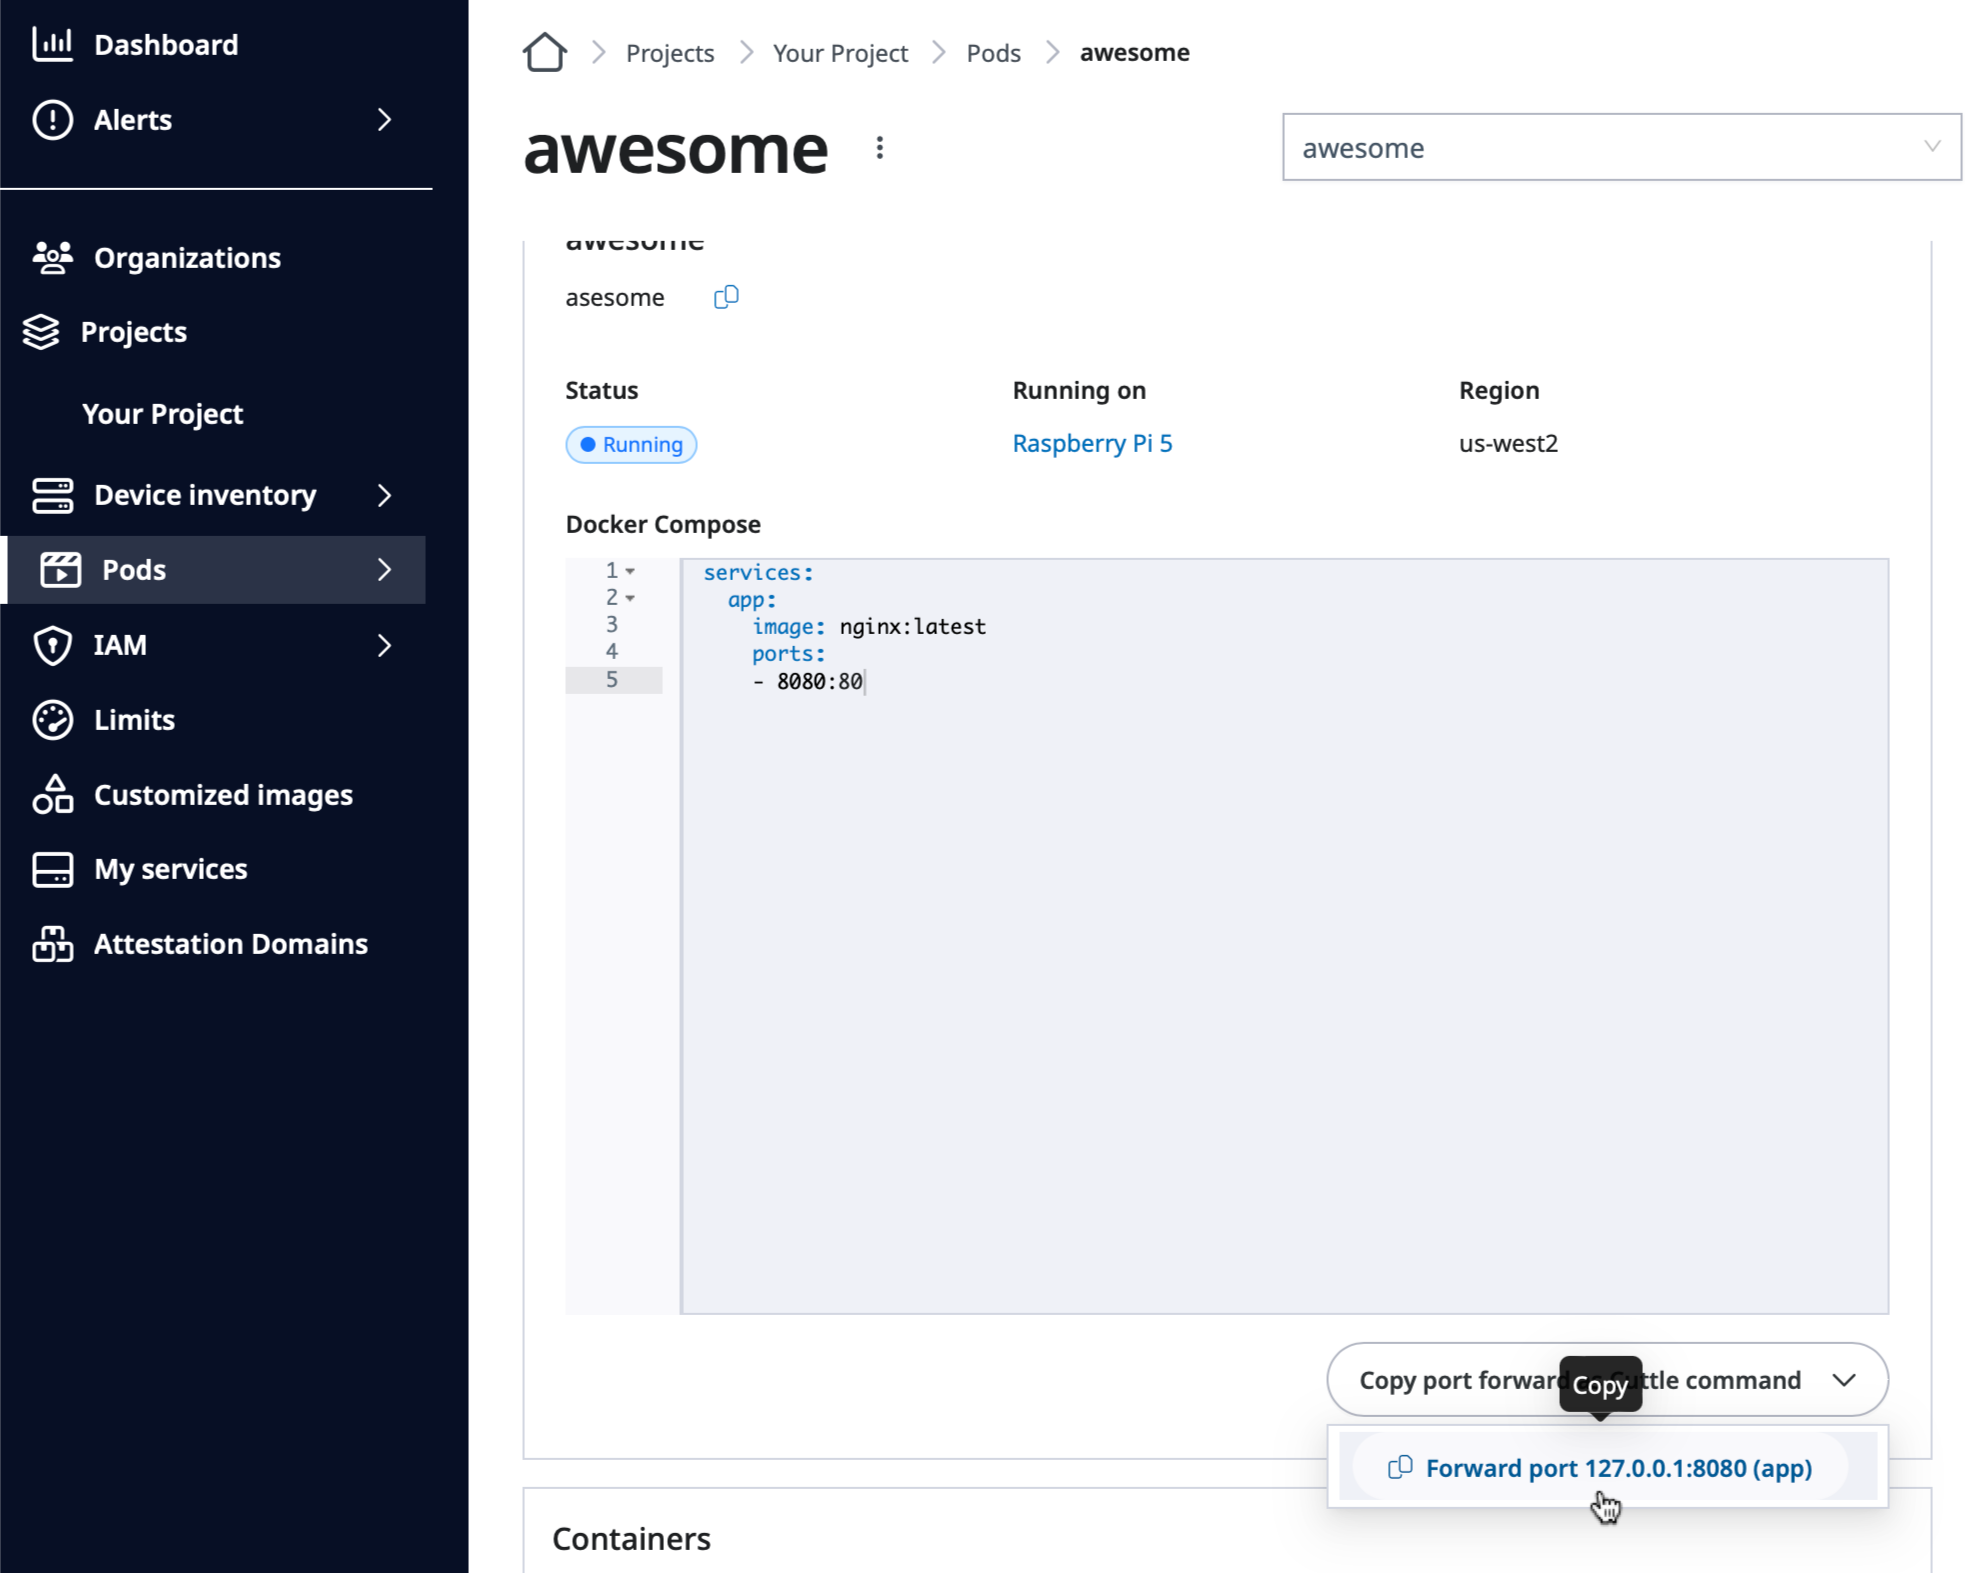
Copy Port forward command option on the Application page.
Open the terminal on your local machine. Paste the command you just copied onto your terminal and run it to enable the port-forwarding to access your application from the local machine.
Here is the example port-forward command for your reference. It enables your application, which is listening on device’s port 8080, reachable through your local machine’s port 8080.
cuttle devices forward-port \
  projects/your-project/regions/us-west2/devices/raspberry-pi-5 \
  8080 tcp://127.0.0.1:8080
With the above port-forwarding command running, point your browser to http://localhost:8080 to access your application from your local machine.
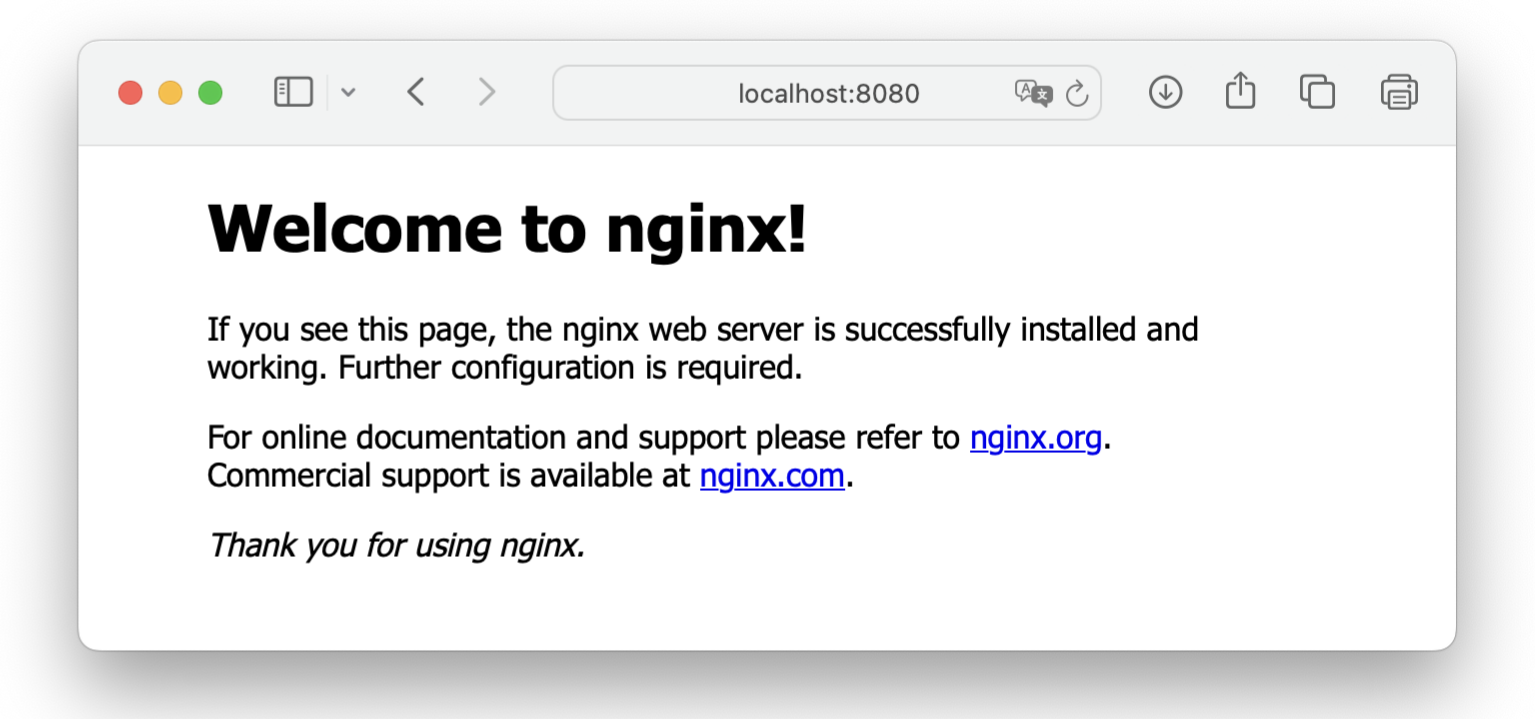
Successfully accessing the application running on your device.
Next steps
Great job! You successfully deployed and verified your first application running on your device with SPEKTRA Edge.
You got there without needing to know how the platform works underneath — but that understanding is what turns this into a fleet of 1,000 devices rather than one. How SPEKTRA Edge works explains what you just did: why you targeted a device instead of logging into it, and what the platform was doing on your behalf while you clicked.
From there, go deeper on whichever part you need:
- Develop an application — build and publish your own image, instead of deploying a public one.
- Deploy an application — the full deployment flow, including configuration and private registries.
- Monitor & control — status, metrics, and logs for a running application.